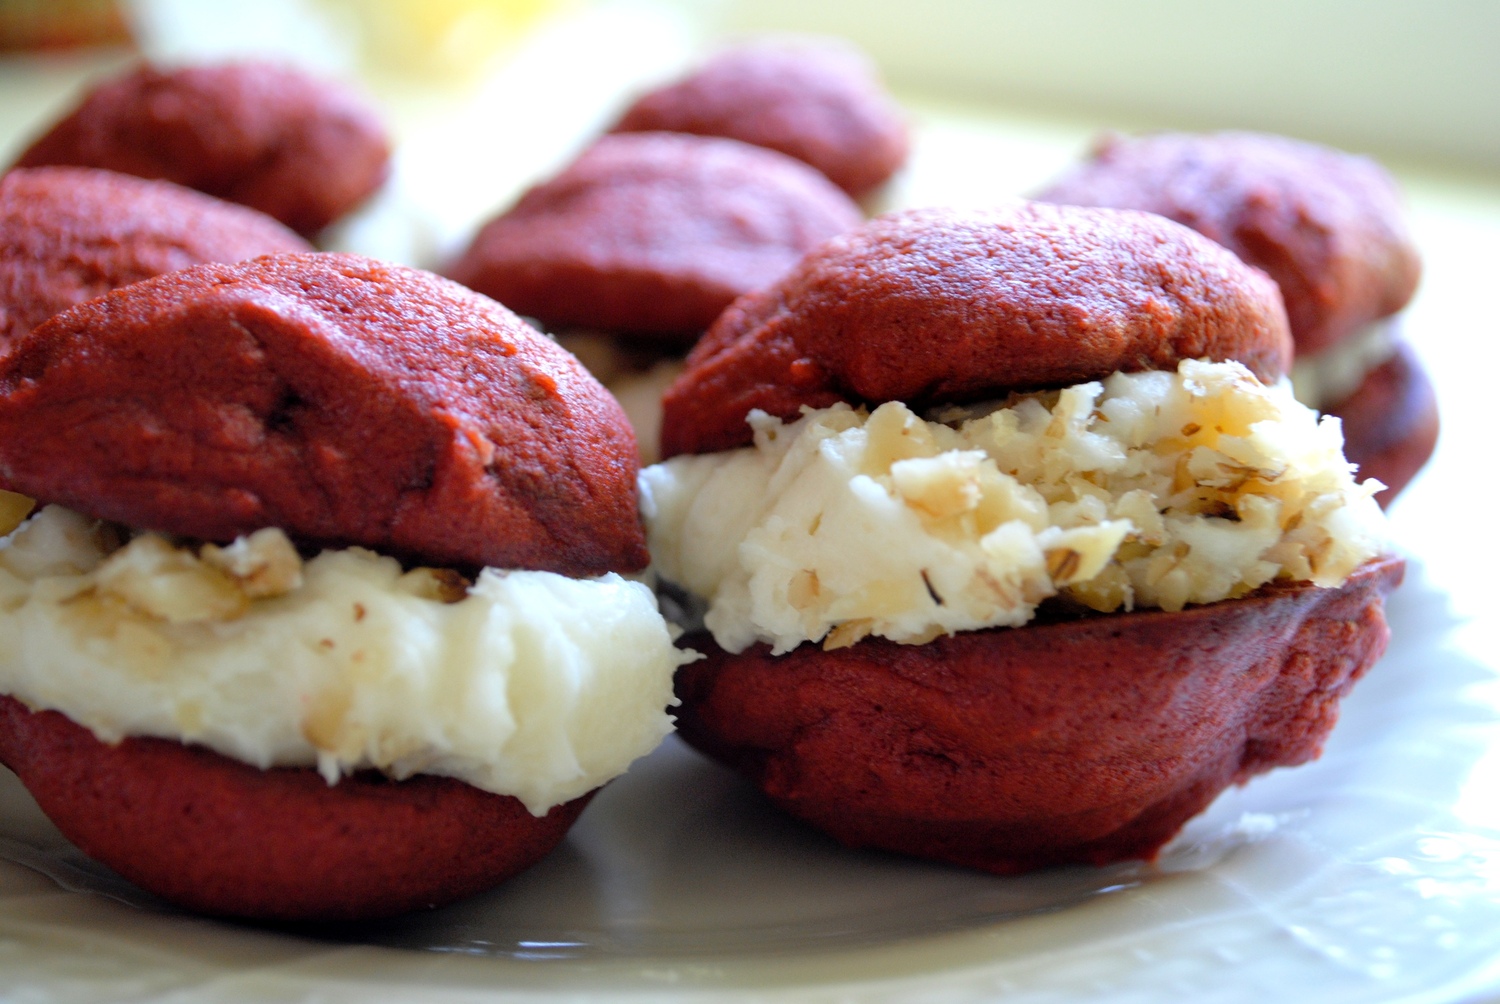
When I think of fancy and elegant baked treats, I think of Red Velvet Whoopie Pies. They are just so good with all that cream cheese jam packed in the middle! I know they are hard to compare to a traditional apple or rhubarb pie but they have all the likings of a real classic dessert. When I made my first batch of Chocolate Whoopie Pies about a month ago I couldn’t believe how simple they were to make. I used to look in recipe books or online for ideas, but whenever I came by some Whoopie pies they just looked too involved and time consuming to bake. That is the worst assumption that I have made in my baking career. Now your thinking, “that is ridiculous Dave, how could you make such an assumption?!” I have no answer to that except don’t make the same mistake as I did, so enjoy and bake away!
Adapted from Baked
Makes 20-25 medium whoops or 35 mini whoops!
Ingredients:
For the Whoopie Pies:
2 ½ cups All purpose flour
3 tbsp Dark unsweetened cocoa powder
½ tsp Baking powder
½ tsp Baking soda
½ tsp Salt
¼ cup Canola oil
½ cup + 2 tbsp Buttermilk (Substitute: ½ tbsp Vinegar and ½ cup milk)
½ cup Butter, softened, cut into pieces
1 tbsp Vegetable shortening, at room temperature OR butter
¾ cup Firmly packed dark brown sugar
¼ cup Granulated sugar
1 Large egg
1 tsp Pure vanilla extract
1 tbsp Red gel food coloring
For the Cream Cheese Filling:
3 cups Confectioners’ sugar
½ cup Unsalted butter, softened
8 ounces Cream cheese, softened
1 tsp Pure vanilla extract
¼ tsp Salt
For the Assembly:
½ cup Toasted walnuts, chopped coarsely
Make the Pies:
- Preheat the oven to 350 degrees F. Line two baking sheets with parchment paper.
- In a large bowl, sift together the flour, cocoa powder, baking powder, baking soda and salt.
- In a small bowl, whisk together the canola oil and buttermilk.
- In the bowl of an electric mixer fitted with the paddle attachment, cream the butter and shortening until smooth. Scrape down the bowl and add the sugars. Beat until the mixture is light and fluffy, about 5 minutes. Add the egg and vanilla extract and beat until combined. Scrape down the sides and bottom of the bowl, add the red gel food coloring, then mix on low speed for a few more seconds to incorporate. Do not over mix.
- Turn the mixer to low. Add the flour mixture, alternating with the buttermilk mixture, in three separate additions, beginning and ending with the flour mixture until just combined. Scrape down the sides and bottom of the bowl, then mix on low speed for a few more seconds.
- Cover with plastic wrap and chill the batter in the refrigerator for about 15 minutes.
- Remove the batter from the refrigerator. Place small tsp sized scoops on the baking pans about 1 inch apart. I made tbsp sized cookies as well but everyone preferred the smaller ones because they were just the perfect size! Bake for 8-12 minutes, until the cookies are just starting to crack on top and a toothpick inserted into the center of a cookie comes out clean. Let the cookies cool completely on the pan while you make the filling.
Make the Cream Cheese Filling:
- Sift the confectioners’ sugar into a medium bowl and set aside.
- In the bowl of an electric mixer fitted with the paddle attachment, beat the butter until it is completely smooth. Add the cream cheese and beat until combined.
- Add the confectioner’s sugar, vanilla, and salt and beat until smooth. Be careful not to over beat the filling or it will lose structure. (The filling can be made 1 day ahead. Cover the bowl tightly and put it in the refrigerator. Let the filling soften at room temperature before using.)
Assemble the Whoopie Pies:
- Spread the walnuts in an even layer on a small plate.
- Turn half of the cooled cookies upside down (flat side facing up)
- Use an ice cream scoop or a tablespoon to drop a large dollop of filling onto the flat side of the cookie. Place another cookie, flat side down, on top of the filling. Press down slightly so that the filling spreads to the edges of the cookie. Turn the Whoopie on its side and roll through the walnuts. Repeat until all the cookies are used. Put the Whoopie pies in the refrigerator for about 30 minutes to firm up before serving. Now have at the Whoops, you will love them!


